Why Java Developers Need Java Messaging System?

This post shares info on Java Messaging System. Java developers are using it in their practice for several reasons. You can read the post and find the reasons.

Why a messaging system?

In the electronics world, data is the actual term used for all information. For which data, “Message” term can be used? Let’s take, a simple scenario if you are registering your details in the web portal, it takes all your information and stores entire data in the relational database which will call as Data. Once you registered successfully, an email functionality triggers, and send an email to you saying that account successfully created. This email event is called as messaging.

In a traditional system, both registering a new user and sending email are tightly couple ex., both are in the same application. This design is extremely responsible, for the system’s performance. Imagine 100s of a user registering in 15 minutes. The same application should focus on creating a new user and sending an email. This process is too costly. To avoid this issue messaging systems come into the picture.

She runs independently and looks for the message and doesn’t care about, where the messages come from. If the message arrives, it consumes the message and sends it to a destination. It is called, loosely coupled and both applications run independently.

The responsibility of Web Portal is to create a new user and to send email to the user is the messaging system’s responsibility. Messaging system is not only used for sending an email. There are many scenarios where we need Messaging system such as notification, a news feed, etc.

There are many messaging systems in the market. RabbitMQ is one of such popular messaging systems in Java, which includes three roles – publisher, subscriber, and queue.

A publisher is the one who sends the message. The sent message will store in temporally in a buffer called a queue. A subscriber is the one who receives the message. These are all players in RabbitMQ, which required for messaging service.

Why we need Apache Kafka?

Since there are more mature messaging systems available in the world, why we need Apache Kafka? That’s a question that triggers the developer’s mind.

The other messaging systems handle only low-volume data. But, Rabbit MQ handles 20K messages per second. Apache Kafka handles 100K messages per second. Kafka provides an easy way to create many Kafka clusters which is called the broker. It is for maintaining load balance. If one broker gets down, the other automatically takes care.

Apache Kafka persists the messages, in hard disk and Java developers can set the lifetime of the message.

Following players are included in the Apache Kafka in the messaging system:

  • Topics
  • Producer
  • Brokers
  • Consumer

Topics

Topics hold the stream of messages. For example Topic, “A” can hold the message “Hello World”. If we create a topic, Kafka creates by default one partition. The partition contains a sequence of an index in which messages are getting stored. Based on our requirement we can create many partitions in Topics as in the diagram.

 Topic “A”

Partition 1
0
1
2
3
4
5
Partition 2
0
1
2
Partition 3
0
1

Producer

The producer uses the topics to send messages to the broker.

Consumer

The consumer receives messages from the broker.

Broker

The broker acts as a middleware component for producers and consumers. If the producer sends messages, those messages are maintained in the broker. Consumers consume messages from the broker.

Using Kafka cluster we can create multiple brokers that maintain the messages and load balance. The beauty of the Kafka broker is that it can handle many reads/writes manipulation without any performance tuning.

The entire Kafka cluster runs in Zookeeper.

What is zookeeper?

Zookeeper is an environment that maintains all Kafka broker and their state. If any Kafka broker is down or not available, Zookeeper is liable to notify Consumer/Producer, so Consumer/Producer will start looking into another available Broker.

System diagram for Kafka messaging system:

Kafka messaging system environment

Kafka messaging system environment

Who are Leaders and Followers?

I have already told that we can create many Kafka brokers in which one Kafka broker is the primary broker that handles all manipulation between Producer and Consumer. This Kafka called Leader, and other Kafka brokers are called followers. Due to some situation the leader Kafka is down or shut down for any reason, zookeeper selects a new leader from an available follower, and notifies to Consumer/Producer about the new Kafka leader. Consumer/Producer starts looking into correct Kafka broker.

Kafka messaging system setup

Download zookeeper from following Apache link

http://www.apache.org/dyn/closer.cgi/zookeeper/

After download go to download folder and open conf folder

zookeeper-3.4.6\conf

You can see zoo_sample.cfg

Copy the this file as zoo.cfg

Open zoo.cfg

Change following property with correct path.

Data Dir=<Your path>

Zookeeper store all data in this path

You have done with Zookeeper configuration and this is a time start zookeeper server.

3

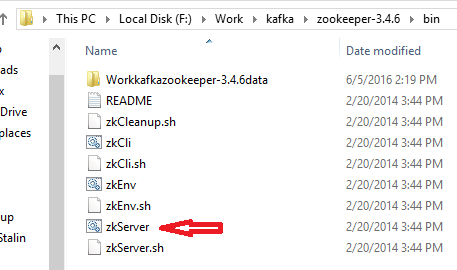
Double click highlighted file(zkServer) to start the zookeeper. You can see following console after starting the Zookeeper successfully.

4

Now we have configured Zookeeper for your Kafka server.

Download Kafka from following apache link

https://www.apache.org/dyn/closer.cgi?path=/kafka/0.9.0.0/kafka_2.11-0.9.0.0.tgz

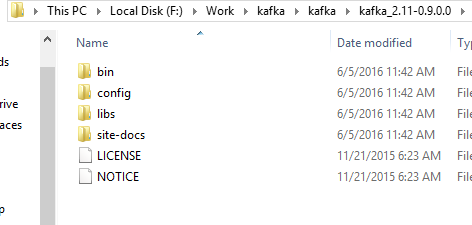
Extract the Kafka download folder as in below screenshot.

5

Go to bin folder and apply following command to start Kafka server.

kafka-server-start F:\Work\kafka\kafka\kafka_2.11-0.9.0.0\config\server.properties

This command starts your Kafka server.

If you want to stop kafka server, go to kafka_2.11-0.9.0.0\bin\windows and click kafka-server-stop

If you are using Linux, go to kafka_2.11-0.9.0.0\bin\

Now we have kafka server that is ready to start. Once you started the kafka server, you can see following console

6

Kafka Producer

publicclass MyProducer

{

                publicstaticvoid main(String[] args) throws Exception{

                                Properties props = new Properties();

                                props.put("bootstrap.servers", "localhost:9092");

                                props.put("acks", "all");

                                props.put("retries", 0);

                                props.put("batch.size", 16384);

                                props.put("buffer.memory", 33554432);

                                props.put("key.serializer", "org.apache.kafka.common.serialization.StringSerializer");

                                props.put("value.serializer", "org.apache.kafka.common.serialization.StringSerializer");

                                 Producer<String, String>producer = new KafkaProducer(props);

                                for(inti = 0; i< 5; i++) {

                                                producer.send(new ProducerRecord<String, String>("test-topic", "Test-Key " + (i+1) ,"Test-Value" + (i+1)));

                                                }

                                producer.close();

    }

}

The above code sets necessary configuration for Kafka producer and creates a new topic called “test-topic” which carries the five different messages. This topic message is sent by producer using producer.send method.

Kafka Consumer

publicstaticvoid main(String[] args) {

                //Kafka Consumer configuration

 Properties props = new Properties();

 props.put("bootstrap.servers", "localhost:9092");

 props.put("group.id", "test");

 props.put("enable.auto.commit", "true");

 props.put("auto.commit.interval.ms", "1000");

 props.put("session.timeout.ms", "30000");

 props.put("key.deserializer", "org.apache.kafka.common.serialization.StringDeserializer");

                props.put("value.deserializer", "org.apache.kafka.common.serialization.StringDeserializer");

                      KafkaConsumer<String, String>consumer = new KafkaConsumer(props);

                consumer.subscribe(Arrays.asList("test-topic"));

while(true){

         ConsumerRecords<String, String>records = consumer.poll(100);

                                for (ConsumerRecord<String, String>record : records)

                                                  System.out.println("Partition Offset = " + record.offset() + " Key = " +  record.key() + " Value = " + record.value());

                                  }

}

In the above code sets, the necessary configuration for kafka Consumer and receiving messages from a producer. The Producer carries the messages via topic called “test-topic”.

Boostrap.servers

It will start up all available brokers in the kafka

Group.id

We can set group name for multiple consumer. In our case our consumer belongs to test group.

enable.auto.commit

It will commit the offset value based on auto.commit.interval.ms

session.timeout.ms

Using this timeout we can find out any failures in Kafka server.

Key.deserializer and value.deserializer

This is for internal string serialization process for message data.

Acks

This property is having three possible values which are 0, 1, and all. If set 0, a producer doesn’t wait for an acknowledgment. If set 1, producer accepts ack from a leader, if set all, producer accepts ack from all replica i.e. if your Kafka server is having more than 1 broker, it accepts the ack from all (Both leader and follower).

Retries

Number of try for sending messages to Consumer

batch.size

Buffer size for batch size. Let say producer is sending multiple messages to a partition, he will use the batch.size.

buffer.memory

The buffer.memory used by producer for sending messages.

Hope you have understood what Java Messaging System is and why Java developers use it. If you have any question, ask from experts and get answered.

TOP 5 JAVA ANOMALY DETECTION TOOLS

Application failures are a certain part of their development. Every developer has faced some errors that crop up as we move forwards. But wouldn’t it be better if the abnormal were detected in real-time and you were warned? Even better, if you could find out what went wrong and where? Luckily, Java Developers from India have quite a few abnormal tools that can help course true in time.

Top Five Java Anomaly Detection Tools

1) X-Pack

An extension of Elastic Stack, X-Pack is necessarily a security characteristic. It works by monitoring logs for data. It monitors, alerts, and reports on the behavior of the logs. It uses machine learning algorithms to monitor log behavior and flag any unusual behavior. The X-Pack also has graph capabilities, using metrics to illustrate user behavior.

It creates a basic behavior pattern by studying data from Elasticsearch logs. The logs are, in turn, culled from servers and applications. The data shows us trends and usage patterns. Any deviation from the pattern helps predict the onset of a problem.

X-Pac is also fantastic easy to install. With Elasticsearch 5.0.0, whenever you install X-Pack, you automatically get access to Watcher, Marvel, and Shieldplugins. Moreover, you also do not have to worry about the plugin version, since it now comes with the X-Pac. With a default detection feature, X-Pac has also tightened user authority. Keep in mind that X-Pac is necessarily an ELK tool and is well-integrated in its architecture. However, it is not as effective if you are out of ELK.

2) Loom Systems

Powered by AI, Loom Systems use log analysis to compare and predict issues that can crop up in the development of an application. It automatically takes logs from applications and breaks them down according to different fields. The parsing of any streamed log is automatic. The AI function then compares the events between different applications, exposing any issues and helping in the prediction of anomalies.

The data is examined according to the field type. The advantage of Loom Systems is its usage of AI to pinpoint the root cause in real-time, allowing you to take corrective action in time. It uses the organizational database to explain the anomaly and provide you with recommended solutions. The Loom also ensures that the baseline remains dynamic, changing as the standard user behavior changes.

The Loom system has many positives – its dynamic baseline that evolves with time, a superior analytic component that exposes flaws and makes us understand why it occurred, and its ability to provide you with an effective solution.

Must Read: Spring Micro-Services in Java

3) OverOps

So far we have only seen tools that detect errors in the log. But what you really need is the source of the error and what caused it. The answer lies in OverOps. Instead of logs, it focuses on the source code and the variable state that causes the error.

The OverOps scores because it is the only tool that focuses on code. It detects when and where a code breaks during the production process. Thus, it gives us a complete picture of the anomaly, helping us to pinpoint the instance it occurred in the code deployment.

It is also pretty easy to install, taking no time in SaaS, Hybrid, and On-premises. It can be hosted as a SaaS application, or deployed on-premises. You may even choose it simply for its uber-cool dashboard. It works with StatsD compliant tools for visualization of anomaly detection.

Working with the JVM, OverOps extracts data from the applications. It compares the variable state with the JVM metrics, showing application errors. OverOps also has a collaborative add-on, providing links for errors in the logs as well. The link takes you to the very cause of the error with the source code.

4) Coralogix

Coralogix uses AI to show segregate the logs into patterns and show their flow, giving us an insight in real-time. While mapping the production flow, Coralogix can instantly detect the moment an issue occurs, giving us precise insight.

Showing the original pattern in the log data also helps in the analysis of Big Data. It works on the assumption that most logs show similar patterns. The process brings out the big anomalies and not every small issue.

5) Anodot

Anodot uses AI to uncover blind spots. It uses patented machine learning algorithms to deliver BI. The company boasts of revolutionary BI that uses your metrics and applies machine learning to analyze the data. Anomalies are detected instantly and an alert is triggered.

DEBUNKING THE MYTH: EXPLORING JAVA 9 MISCONCEPTIONS

Java is doubtlessly one of the top-most programming languages in the world. Despite its beginning as a program for set-top boxes, it remains one of the most widely used languages. It is not just preferred by programmers and coders, it is also a popular language when it comes to teaching programming languages in schools and universities.

But Java also comes with too much of myths and misconceptions. Some of it is inevitable with a popular language where murmurs on its features and efficiency become Chinese whispers. But some also stock from its beginning as a simple language that looked too good to be true. Its creator’s bold announcement of “write once, run anywhere” was considered a bit too revolutionary.

Although Java has come far since its starting – now with Java 9, the misunderstanding surrounding it is still quite prevalent. This is despite the fact that many programmers chose to keep working on Java and you can easily hire java developers for enterprise application development.

Let’s check some of these myths:

Java is dead

We’ll call this is the strangest myths regarding Java that refuses to die down despite the fact that rates among the top programming languages used across the world. Don’t take our word for it. Check out the RedMonk Programming Language Ranking the TIOBE index which has repeatedly found Java among the topmost popular languages. Java remains alive and thriving.

Read Also: Java Developers Are Available For Hiring In Most Offshore Development Companies

Java is slow

This one has some basis in truth and it stems from the JVM or the Java Virtual Machine. One of Java’s USPs was “write once, run anywhere”. But this depended on the JVM that gave it the cross-platform portability. But JVM also meant an additional infrastructure layer, which would obviously slow down the entire process. In addition, some early JVMs were actually pretty slow.

But the scenario is quite different now. The new JVMs are quite fast. The speed of our hardware also means that the delay is negligible. It may matter in applications where every second counts, but for most applications, Java’s speed is a complete non-issue.

Java suffers no memory leaks

When we compare it with C and C++, Java seems pretty foolproof against memory leaks. In the other two languages memory leaks can occur anytime there is an error in allocating the location. Since this is done by the programmer, simple human error makes the possibility of a memory leak ever-present. Java removes the human factor by automating memory management. The garbage collector later does the clean-up for objects with no references.

However, the clean-up depends on the reference and if a reference remains, the garbage collector will skip it. In effect, this will be the same as a memory leak. Finally, it will run out of free memory. So, though it may have better memory management, a programmer can’t provide to ignore cleaning-up.

Java cannot be embedded because it’s too big

It started with 20 class libraries and now Java 9 has more than 6000! These are critical support bases since Java cannot depend on a specific platform-based library. For Java developers, the libraries are especially handy since there is little need to take support of a third party. But it did make Java’s size very big. Full JRE took as much as 40MB of storage space.

But Java has addressed this issue actively in its last few versions. Java 8 introduced solid profiles, the smallest of which would need just 10 MB. Java 9 has created a modular format so that one can pick and choose what one wants, restraining the size.

Java is not secure

This idea gained traction when an idea was floated that an applet can easily access a hard drive. With this came scares of corruption and even erasures. But, in truth Java security is not that light. An applet cannot access the system with impunity. There are checks and balances to prevent this. A digitally signed applet will trigger warning systems in the OS, asking the user if they acknowledge it.

Conclusion

Java has been around long sufficient to develop its own mythology. From the sole language that can fix it all to its features and functionality, there are obviously many myths associated with Java. While some may have come from earlier versions, others are just not true.

Does Your Outsourcing Java Development Vendor Know About Heroku?

Just in case you are a server admin or an enterprise java developer who develops, deploys, and operates applications on traditional Java EE application servers, this article fits best for you.

In this article, we will describe how you can develop and deploy Java apps on Heroku. If you are an organization that is searching for a vendor to outsource java development, you must learn the basics of Heroku for your good.

Heroku is a platform that is specifically intended for the development and deployment of applications. This platform is different from the conventional software delivery process that involves the following steps-

  • Development
  • Packaging
  • Distribution
  • Installation
  • Deployment

Heroku is used by companies that develop, deploy, and operate an app with a team or a few teams. There is no such requirement of packaging, distribution, or installation of elements as the code never leaves the team. The platform is more agile and once you consider it, you can easily decide how to make the best use of Heroku as a deployment platform.

Version Control – The Central Distribution Mechanism     

There is no reason to design a package of your code that can be used by outside parties. Users can simply choose the artifacts for the app. The runtime will execute your application directly from the file structure that is developed by the build process.

Deployment Is An Automated Pipeline Process

As the end-to-end lifecycle of the software is regulated by a single team or company, users can leverage standard build automation tools and version control to partially or fully automate the process of delivery.

The build system usually derives automation for the project that is assisted by tools, such as continuous integration servers.

How Do Apps Use Java EE Apis In The Absence Of Container?

Here are a few tricks to using Java EE APIs without a container:

  • You can write Servlets and JSPs by simply using Jetty Library or Tomcat.
  • You can take the help of JSF and other rendering frameworks using MyFaces or Mojarra.
  • You can use JDBC to link to databases

If you want to outsource professional Java development services from an IT company, make sure its experts or java programmers should know about the Heroku platform and its uses.

Related Article:

Developing A 3-Tier App With Java EE Development -A Secure Decision

Why You Should Outsource Your Java Development Work

CACHE MANAGEMENT IN JAVA – CACHING TECHNIQUES

Introduction

This post is intended by java application development professionals to make you learn about the tricks to design the caching system in java. The samples that professionals are sharing in this article will help you in gathering knowledge of the caching system and you will be able to design it for your project.

What is Cache?

The Cache is a local area where we can access the data very fast.  We can use cache management in all applications for better performance.

Let’s say you have a rest web Service or Database in which you are fetching Customer details and returning Customer Profile data. Whenever call the Customer Profile API, it will go to a third-party reset server or database then, fetch the customer data and return back to our destination system.  Let’s assume that there are several thousands of people in the portal calling many times the same Customer Profile API. Each time the Customer Profile API invokes and fetches data from the Rest Service or Database. This process is too expensive. This will bring down the system’s performance and the response time of the System will increase. To avoid this situation we will use Cache management.

Following is a System diagram without caching layer (diagram 1)

Following is a system diagram with caching layer (diagram 2)

Caching layer’s responsibility is to take the data from the destination System and store all those data in memory. Most caching system stores the data in key-value pair. It is very similar to Java HashMap but, it is very big with the option to configure some useful features on caching data, such as lifetime and Ideal time period, etc.

Based on the second diagram, the client system looks for the data first in caching system, if data is exist in the caching system, it will respond to the client system. If requested data is not found or not the latest data, the request goes to the rest service or database server for new data then, updates the data in the caching system.

This process happened in the following two cases.

  1. If the data request is the very first time.
  2. The requested data is very old or outdated data.

There are many open-source caching systems in the market. All are having their own advantages and disadvantages so, your responsibility to pick the right caching system for your project requirement. I am implementing the above cache system (diagram 2) through the EH cache management.

Following is the ehcache.xml file configuration

<ehcache>

<diskStorepath=“java.io.tmpdir”/>

<cachename=“test-cache”

maxEntriesLocalHeap=“10000”

eternal=“false”

timeToIdleSeconds=“120”

timeToLiveSeconds=“120”

overflowToDisk=“true”

maxEntriesLocalDisk=“10000000”

diskExpiryThreadIntervalSeconds=“120”

memoryStoreEvictionPolicy=“LRU”>

</cache>

</ehcache>

Above is XML based configuration and also, we can do configuration by programmatically like below.

Cache cache = manager.getCache(“test-cache”);

CacheConfigurationconfig = cache.getCacheConfiguration();

config.setTimeToIdleSeconds(60);

config.setTimeToLiveSeconds(120);

config.setMaxEntriesLocalHeap(10000);

config.setMaxEntriesLocalDisk(1000000);

config.setEternal(true);

config.setOverflowToDisk(true);

config.setDiskExpiryThreadIntervalSeconds(120);

config.setMemoryStoreEvictionPolicyFromObject(MemoryStoreEvictionPolicy.LRU);

Here, I am explaining the exact use of caching configuration attributes.

maxEntriesLocalHeap

Using this property we can tell how much cached data can keep in the Cache System.

timeToIdleSeconds

If any cached data is not used by the application, those cached data consider idle cached data.  Using this property we can set an idle time period for cached data. For example, if timeToIdleSeconds =”120”, the cached data can be idle till 120 seconds, after that cached data is destroyed from the memory.

timeToLiveSeconds

Using this property we can set the lifetime of cached data. If you set 500, the lifetime of cached data is 500 seconds, after that cached data will be destroyed from the memory.

Eternal

If you want to override or change the value of timeToIdleSeconds and timeToLiveSeconds, eternal should be true. If this is true, dynamically you can change idle and a lifetime of cached data.

overflowToDisk

If the cached memory reached its maximum, the cached old data write-in system’s physical disk.

maxEntriesLocalDisk

Using this property you can set the maximum local Disk storage limit for your cached data.

diskExpiryThreadIntervalSeconds

The thread runs and monitors to check the life of disk cached data whether expired or not. If expired, those data are destroyed from the disk. This thread runs by default in 2 seconds interval. You can change based on your necessity.

memoryStoreEvictionPolicy

Using this property we can set the following one of policy on your caching system based on your requirement.

  • LFU (Least Frequently Used) – the default
  • LRU (Least Recently Used)
  • FIFO (First In, First Out)

LFU (Least Frequently Used)

This policy checks that minimal frequently used items by the application in the cache System and destroys those items from the memory. For example, you have two items in the cache memory, one used by 50 users and the second one used by 10 users. This policy removes the second item.

LRU (Least Recently Used)

This type of caching policy checks the cached data which are very minimal used recently. For example, you have two items in the cache system, one used by 50 users and the second one used by 10 users; again the first one was used by 2 users, so the first item was removed from the cache system.

FIFO (First In, First Out)

This policy removes the items that were placed in the cache first. For example, if you have 100 items in the cache. If the cache system reaches the limit, the 1st item is removed from the cache system.

Below is the sample program which looks up the data from the cache, if the data do not exist in cache systems, the application picks up the data from the database and adds those data to the cache system.

Following method to get cache details which configured in ehcache.xml

public Cache getCache() {

CacheManagermanager = CacheManager.newInstance(“ehcache.xml”);

Cache cache = manager.getCache(“test-cache”);

returncache;

}

Following method to get the cache data from the cache system.

public Customer getCustomerData(longcustomerId) {

Customer customer = null;

Cache cache = getCache();

Element element = cache.get(customerId);

if(element != null) {

customer = (Customer)element.getObjectValue();

}

returncustomer;

}

Following method to add the data to cache system

publicvoidaddDataToCache(Customer customer) {

Cache cache = getCache();

Element element = new  Element(customer.getCustomerId(),customer);

cache.put(element);

}

Following code fetch the customer data from database

@Transactional

public Customer getCustomerById(longcustomerId) {

Customer customer = null;

try{

Session session = sessionFactory.getCurrentSession();

Query query = session.createQuery(“from Customer customer where customer.customerId=:customerId”);

query.setLong(“customerId”, customerId);

List<Customer>list = query.list();

if(list != null){

customer = list.get(0);

}

}catch(Exception ex){

ex.printStackTrace();

}

returncustomer;

}

Read More: The Java Web Development Trends to Pick Momentum in 2018

Client code

Following the client, the code uses the above methods. This client code checks the Cache System for requested data. If data is not found, it will look up the data in the database then, display it to the customer and those data in Cache System for the customer’s future request.

Customercustomer = null;

CachedDatacachedData = newCachedData();

customer = cachedData.getCustomerData(1);

if(customer != null) {

System.out.println(customer.getCustomerId() + ” ,  ” + customer.getCustomerName() + ” , ” + customer.getEmailId());

}else{

AbstractApplicationContextctx = newClassPathXmlApplicationContext(“classpath:applicationContext.xml”);

CustomerDaocustomerDao = (CustomerDao)ctx.getBean(“customerDao”);

customer = customerDao.getCustomerById(1);

System.out.println(customer.getCustomerId() + ” ,  ” + customer.getCustomerName() + ” , ” + customer.getEmailId());

cachedData.addDataToCache(customer);

}

I hope you understand how to design the caching system for your project. The above samples are simple caching systems, but it gives you a good startup for your caching system design for your project.

Java application development professionals hope you have completely understood the cache management design. You can create your design on your own and share your experience with our readers. For any doubt or query, write to the experts and get answers.

HOW TO USE JENKINS WEB-BASED BUILD MANAGEMENT TOOL IN JAVA APPLICATIONS?

In this post, java application development experts will discuss Jenkins web-based build management tool and its requirement in developing projects. You can read this post and learn how to install Jenkins and make the best use of this management tool.

Introduction:

The necessity of building a tool is to integrate the source code properly which is developed by many people for a single project. Each developer works on different modules from the same code base, so frequently the code gets updated.

The build management tool’s responsibility is to take the latest version of code from the repository and produce the new version of Project.  The good feature of Jenkins is we can use any build tool and version control. For example, if you are using ANT based build tool, we can configure ANT in Jenkins for your project build process.

If your project is using a Maven-based build, you can configure Maven for your Project. Similarly, you can set up any version control which is available from Jenkins. You can use CVS, SVN, and GIT, etc.  So, The Jenkins is not live with one particular tool, based on the project requirement, we can customize the Jenkins.

I will be explaining the following things in this article.

  1. Jenkins installation steps.
  2. Creating Project in Jenkins
  3. Integrating the Maven build tool in Jenkins
  4. Building project using Jenkins.

Jenkins installation steps

Go to the following official website for Jenkins

https://jenkins.io/

Once you click the download button it will prompt the following window

Click LTS Release which is a stable one. You will be getting the installer file from the download. Double click on the installer and follow the steps to install. You will be seeing the following steps to install it successfully.

After successful installation following folder should create in your windows S.

<Your drive>:\Program Files (x86)\Jenkins

Following the path, you can see a Jenkins.war.

C:\Program Files (x86)\Jenkins

Copy Jenkins war file to your tomcat location of web app folder. Start the tomcat server by clicking the startup.bat file. After starting the server, you can see the Jenkins-related logs in the server console without error. It means Jenkins deployed in the server successfully.


In the web app folder, you can see the Jenkins folder which is extracted from Jenkins.war.

Use the following URL to get the Jenkins home page in your local.

http://localhost:8080/

This URL gives the home page of Jenkins as in the below screenshot.

Now, we have installed Jenkins in our system and it is running successfully.

Creating Project in Jenkins

Creating Project means you are creating a building management Project for your existing Java Project.

Click “create new jobs”. It will show the following screen.

Select maven project and enter the project name. Here I have entered it as “java-spring-maven” then click ok. Next it will ask you to enter project settings for “java-spring-maven” as in the screenshot.

Add some description about the project as in the screenshot.

Select source management as none because I have not used any source management.

Enter the pom.xml file path in the Root POM text field and enter the maven Goals as in the screenshot. The pom.xml file path should be from your java project folder. In this example, I am using the java-spring Project which is coming from “F:\Work\example-workspace\java-spring”. Create a simple maven-based project using eclipse and share that pom.xml file in the field as in the above screenshots.

If you want to get an email notification while building failure, select the “E-mail Notification” check box and enter a valid email as in the screenshot.

Once you enter all, click the Save button and the following screen will appear.

Till now we have integrated the maven build tool in Jenkins for a java based maven Project.

We have configured the maven build tool in our project and the next step is we need to add JDK and maven in Jenkins to run the build.

Click manage Jenkins, you will get the following screens.

Click Configuring system
Click Add JDK Button as in the screenshot

Once you click “Add JDK” the following section will appear.

Deselect install automatically checkbox. Once you have done that, the following section will appear.

Enter your Java version name in the JDK Name field and enter your java home in the JAVA_HOME field as in the screenshot.

Now we need to give maven information as follows. Click Add maven button as in the screenshot.

Once you click, the following section will appear.

Unselect the “install automatically” check box. You will get the following section.

In the Above section, you need to enter the maven name and maven home as in the screenshot below.

We have entered the JDK details and Maven details. Now click the save button. Once it is saved successfully following screen will appear.

The screen shows the Project details. Click on the project name. Once you click it, navigate to the following screen where it says about the Project information.

We have completed the build setup. Now, this is a time to build the application using Jenkins. Click the “Build Now” link in the side navigation bar as in the above screenshot. Once you click the “Build Now” link, your project build will start and shows a progress bar as in the below screenshot.

If the build is completed the progress bar will disappear. Now click the #1 link, it will show the build details as in the screenshot.

As per the above screenshot, we have completed one build successfully. If you want to see the build log click “Console Output” in the side navigation bar. It will show the build log as in the below two screenshots.

Click “Back to Project” from the side navigation bar.

Once you click, you will be navigated to the project home page as in the below screenshot

If you see highlighted red color box, it shows the build details such as build happened time and how the build went whether success or failure, etc. This is showing that our build is successful.

If you click “#1”, it will go to the following details page.

The ‘Module builds” showing as java-spring. It is our java project nameWhenI set the pom.xml path in the project settings, I have pointed out the pom.xml file which belongs to “java-spring” if don’t remember, go back and check the project settings in the document.

When clicking the “Java-spring” link, the following screen will appear. This shows generated war file for our deployment which is java-spring-0.0.1-SNAPSHOT.war

Hope this article will help you in making the best use of the Jenkins tool in java application development. If you did not understand anything, contact professionals and ask your doubts. You can leave your feedback for this post in your comments.

Related Article:

How To Protect Your Intellectual Property While Outsourcing Java Development Projects

Why Java Developers Need Java Messaging System?

Spring Data Rest – Repositories

Professionals of Java outsourcing company are sharing this post with an intention to make you learn about Spring Data Rest and repositories. You will also learn about the customization methods used for Spring Data Rest.

Technology: Spring Data Rest is the framework on top of Spring Data Framework for producing the Rest API. It uses Spring MVC and Spring Data frameworks to export all functionalities through Rest API and integrates the resources with hyper media-based functionality using Spring Hateos automatically.

Getting Started:

Spring Data Rest is implemented as a plugin for Spring-based applications, we can easily integrate this with spring.

Prerequisite:

Integrating with Spring Boot Applications:

  • Maven Dependency:
<dependency>
  <groupId>org.springframework.boot</groupId>
  <artifactId>spring-boot-starter-data-rest</artifactId>
</dependency>
  • Gradle Dependency:
compile("org.springframework.boot:spring-boot-starter-data-rest")

Integrating with Spring MVC applications:

  • Gradle Dependency:
Compile ("org.springframework.data:spring-data-rest-webmvc:2.5.2.RELEASE")
  • Maven Dependency:
<Dependency>
            <groupId>org.springframework.data</groupId>
            <artifactId>spring-data-rest-webmvc</artifactId>
            <version>2.5.2.RELEASE</version>
</dependency>

Configuring Spring Data Rest:

Spring Data Rest provides RepositoryRestMvcConfiguration configuration java file which will contain all beans required for Spring Data Rest.

We need to import RepositoryRestMvcConfiguration class to our application configuration so that Spring Data Rest will bootstrap.

This step is not needed if we are using Spring Boot’s auto-configuration.

Spring Boot will automatically enable Spring Data REST if we include spring-boot-starter-data-rest and either in the list of dependencies, and application is flagged with either @SpringBootApplication or @EnableAutoConfiguration.

We can also customize the Spring Data Rest default behavior in two ways:

  • We can implement RepositoryRestConfigurer
  • We can extend the RepositoryRestConfigurerAdapter It is one of the empty implementations of the RepositoryRestConfigurer interface. And we can override the methods for our customization.

The list of methods available in the RepositoryRestConfigurer interface:

public interface RepositoryRestConfigurer {
            void configureRepositoryRestConfiguration(RepositoryRestConfiguration config);
            void configureConversionService(ConfigurableConversionService conversionService);
            void configureValidatingRepositoryEventListener(ValidatingRepositoryEventListener validatingListener);
            void configureExceptionHandlerExceptionResolver(ExceptionHandlerExceptionResolver exceptionResolver);
            void configureHttpMessageConverters(List<HttpMessageConverter<?>> messageConverters);
            void configureJacksonObjectMapper(ObjectMapper objectMapper);
}

Using configureRepositoryRestConfiguration we can override the baseUri, pageSize, maxPagesize, and pageParamName,sortParamName,limitParamName,and defaultMediaType.

Using this also we can configure

1)returnBodyOnCreate: if the object is created do we need to send the created object in response body or not. If this property is true then it will send the created object in response body otherwise it will not.

2) returnBodyOnUpdate: If the object is updated do we need to send the updated object in response body or not. If this property is true then it will send the updated object in the response body otherwise it will not.

3)useHalAsDefaultJsonMediaType: we need HAL(Hypermedia Links) to response or not.

configureConversionService: It will override with this Spring Default conversion service factory, if we added any new conversion services, for matters we can add to ConfigurableConversionService class.

configureValidatingRepositoryEventListener: we can configure the validator manually, for each type of event we can add the validator.

While saving the entity Spring Data will raise beforeSave, after saving events, what are the different validators we need to invoke for each event?

configureExceptionHandlerExceptionResolver: The default exception resolver on which we can add custom argument resolvers.

configureHttpMessageConverters: we can configure all HTTP Message Converters.

configureJacksonObjectMapper: we can customize the object mapper. Object Mapper to be used by the system.

Spring Data REST uses a RepositoryDetectionStrategy to determine if a repository will be exported as a REST resource or not. The following strategies

(enumeration values of RepositoryDiscoveryStrategies) are available:

NameDescription
DEFAULTExposes all public repository interfaces but considers @(Repository)RestResource’s exported flag.
ALLExposes all repositories independently of type visibility and annotations.
ANNOTATIONOnly repositories annotated with @(Repository)RestResource are exposed, unless their exported flag is set to false.
VISIBILITYOnly public repositories annotated are exposed.

Customizing the base URI:

  • spring data rest provides RepositoryRestProperties class, using this we can customize the properties.

Eg: spring.data.rest.basePath=/api

  • We can create a configuration class extending RepositoryRestConfigurerAdapter
@Component
Public class RepositoryRestConfigurer extends RepositoryRestConfigurerAdapter {
      @Override
      Public void configureRepositoryRestConfiguration(RepositoryRestConfiguration config) {  
            config.setBasePath("/api")
      }
}

Resource discoverability: The main advantage of HATEOAS is that resources should be discoverable through the publication of links that point to the available resources.

HATE OS has some standards to show how to represent links in JSON format; by default, Spring Data Rest uses HAL to render its responses. Resource Discovery will start from the root, we can extract the links the from root response and every child resource link can be found from their parent.

We can use the curl command to get the resource links:

After the server starts, we can hit the command curl -v http://localhost:8080 it will show all possible children to it.

Sample response will be:

* Rebuilt URL to: http://localhost:8080/
*   Trying ::1...
* Connected to localhost (::1) port 8080 (#0)
> GET / HTTP/1.1
> Host: localhost: 8080
> User-Agent: curl/7.50.0
> Accept: */*
> 
< HTTP/1.1 200 OK
< Server: Apache-Coyote/1.1
< Content-Type: application/hal+json; charset=UTF-8
< Transfer-Encoding: chunked
< Date: Fri, 22 Jul 2016 17:17:59 GMT
< 
{
  "_links”: {
    "people”: {
      "Href”: "http://localhost:8080/people{?page,size,sort}",
      "templated”: true
    },
    "profile”: {
      "Href" : "http://localhost:8080/profile"
    }
  }
}* Connection #0 to host localhost left intact

Creating Spring Data Rest applications:

We require to create a model class and mark it as an entity.

Import javax.persistence.Entity;
Import javax.persistence.GeneratedValue;
Import javax.persistence.GenerationType;
Import javax.persistence.Id; 
@Entit
public class Person 
      @Id
      @GeneratedValue (strategy = GenerationType.AUTO)
      privatelong id
      private String firstName;
      Private String lastName;
      public String getFirstName() 
            returnfirstName;
      }
      Public void setFirstName (String firstName) {
            this.firstName = firstName;
      }
      public String getLastName() {
            returnlastName;
      }
      public void setLastName(String lastName) {
            this.lastName = lastName;
      }
}

And we can use PagingAndSortingRepository which is provided by Spring Data, it will provide all the methods not only for CRUD operations and also for pagination support.

Spring Data rest provides @RepositoryRestResource annotation which will expose all public methods which are marked with exported=true are exported as Rest API endpoints.

Creating Spring Data Rest Repositories:

Import java.util.List;
Import org.springframework.data.repository.PagingAndSortingRepository;
Import org.springframework.data.repository.query.Param;
Import org.springframework.data.rest.core.annotation.RepositoryRestResource;
@RepositoryRestResource(collectionResourceRel = "people", path = "people")
publicinterface PersonRepository extends PagingAndSortingRepository<Person, Long> {
      public List<Person> findByLastName(@Param("name") String name);
}

RepositoryRestResource annotation will create endpoints for all the CRUD and as well as paging and sorting endpoints.

Creating the Main class for Spring Boot:

@SpringBootApplication
public class Application {
      public static void main(String[] args) {
            SpringApplication.run(Application.class, args);
      }
}

1) GET: to get the data for the entity.

2) POST: saving the entity.

3) PUT: updating the entity.

4) DELETE: deleting the entity.

If we run the application and when we run the curl command for people:

E:\curl>curl -v http://localhost:8080/people
*   Trying ::1...
* Connected to localhost (::1) port 8080 (#0)
> GET /people HTTP/1.1
> Host: localhost: 8080
> User-Agent: curl/7.50.0
> Accept: */*
> 
< HTTP/1.1 200 OK
< Server: Apache-Coyote/1.1
< Content-Type: application/hal+json;charset=UTF-8
<Transfer-Encoding: chunked
< Date: Fri, 22 Jul 2016 17:35:28 GMT
< 
{
  "_embedded" : {
    "people" : [ ]
  },
  "_links”: {
    "self”: {
      "href" : "http://localhost:8080/people"
    },
    "profile" : {
      "href”: "http://localhost:8080/profile/people"
    },
    "search" : {
      "href" : "http://localhost:8080/people/search"
    }
  },
  "page" : {
    "size" : 20,
    "totalElements" : 0,
    "totalPages" : 0,
    "number" : 0
  }
}* Connection #0 to host localhost left intact

Creating a Person record:

We can create a record either using the curl command or we can use postman to create a record using the POST method with http://localhost:8080/people.

curl -i -X POST -H “Content-Type: application/json” -d ‘{ “firstName” : “sravan”, “lastName” : “Kumar” }’ http://localhost:8080/people

Response from endpoint:
{
 
  “firstName”: “sravan”,
 
  “lastName”: “kumar”,
 
  “_links”: {
 
    “self”: {
 
      “href”: “http://localhost:8080/people/1&#8221;
 
    },
 
    “person”: {
 
      “href”: “http://localhost:8080/people/1&#8221;
 
    }
 
  }
 
}
Response headers:
 
Location →http://localhost:8080/people/1

The response will depend upon the returnBodyOnCreate property.

The location header will give the URL to generated record.

The query for all records:

We can use the same URL 
http://localhost:8080/people GET method to get the data.
 
The response will look like this:
 
{
 
  “_embedded”: {
 
    “people”: [
 
      {
 
        “firstName”: “sravan”,
 
        “lastName”: “kumar”,
 
        “_links”: {
 
          “self”: {
 
            “href”: “http://localhost:8080/people/1&#8221;
 
          },
 
          “person”: {
 
            “href”: “http://localhost:8080/people/1&#8221;
 
          }
 
        }
 
      }
 
    ]
 
  },
 
  “_links”: {
 
    “self”: {
 
      “href”: “http://localhost:8080/people&#8221;
 
    },
 
    “profile”: {
 
      “href”: “http://localhost:8080/profile/people&#8221;
 
    },
 
    “search”: {
 
      “href”: “http://localhost:8080/people/search&#8221;
 
    }
 
  },
 
  “page”: {
 
    “size”: 20,
 
    “totalElements”: 1,
 
    “totalPages”: 1,
 
    “number”: 0
 
  }
 
}
 
To get the individual records: use the GET method of http://localhost:8080/people/1
The response will look like this:
 
{
 
  “firstName”: “sravan”,
 
  “lastName”: “kumar”,
 
  “_links”: {
 
    “self”: {
 
      “href”: “http://localhost:8080/people/1&#8221;
 
    },
 
    “person”: {
 
      “href”: “http://localhost:8080/people/1&#8221;
 
    }
 
  }
 
}
Searching for entity:

Listing all possible search endpoints:
 
GET method of http://localhost:8080/people/search
 
It will show the all possible methods that we specified in Repository Resource.

Sample response will look like this:
 
{
 
  “_links”: {
 
    “findByLastName”: {
 
      “href”: “http://localhost:8080/people/search/findByLastName{?name}”,
 
      “Templated”: true
 
    },
 
    “self”: {
 
      “href”: “http://localhost:8080/people/search&#8221;
 
    }
 
  }
 
}
 
In PersonRepository class we only specified one method to the records, so the response will contain only the search method.

Searching for entities using findByLastName endpoint:
Ex: http://localhost:8080/people/search/findByLastName?name=kumar

If we remembered the method argument for findByLastName we have a specified name argument that is annotated with @Param, which means for executing this method it needs a name parameter.

The Response will look like this:
 
{
 
  “_embedded”: {
 
    “People”: [
 
      {
 
        “firstName”: “sravan”,
 
        “lastName”: “kumar”,
 
        “_links”: {
 
          “self”: {
 
            “href”: “http://localhost:8080/people/1&#8221;
 
          },
 
          “person”: {
 
            “href”: “http://localhost:8080/people/1&#8221;
 
          }
 
        }
 
      }
 
    ]
 
},
 
  “_links”: {
 
    “self”: {
 
      “href”: “http://localhost:8080/people/search/findByLastName?name=kumar&#8221;
 
    }
 
  }
 
}
 
Updating an entity:
PUT method: http://localhost:8080/people/1
We can pass the JSON as a request body it will update the record.
Sample request body:
 
{  “firstName” : “sravan1”,  “lastName” : “kumar1” }
 
Sample response will look like this:
 
{
 
  “firstName”: “sravan1”,
 
  “lastName”: “kumar1”,
 
  “_links”: {
 
    “self”: {
 
      “href”: “http://localhost:8080/people/1&#8221;
 
    },
 
    “person”: {
 
      “href”: “http://localhost:8080/people/1&#8221;
 
    }
 
  }
 
}
 
Deleting the record:
DELETE method for http://localhost:8080/people/1
It will delete the record.

Conclusion:
Using Spring Data Rest, repositories can be exposed as rest services. By writing entity class and repository interface, all CRUD and search paging and sorted related endpoints will be generated by Spring Data Rest without writing any code.

Spring Data Rest uses HAL (hypermedia links) to render their response.

Hope the experts of the java outsourcing company have made you clear about the concept of Spring Data Rest. If you want to ask anything related to the subject, mention it in your comments and wait for their response.

Related Articles:

How to use AWS Cloud watch? Explain the concept to make a Java application development process simpler

Can Outsourcing Java Services Be An Answer To Technology Concerning Doubts Of People?

SPRING RETRY FRAMEWORK FOR BETTER JAVA DEVELOPMENT

In this article, you will get knowledge about the Spring Retry framework. Professionals of Java development company have introduced this technology and shared their top knowledge for the same. You can read this article and obtain how they use this technology.

Technology: Spring Retry is the framework to support retries support for spring-based applications in a declarative way. This framework immediately recreates the method for booming operation for specified attempts, this framework also supports after the many times attempts we can define the fallback method so that it will be executed.

Whenever software applications communicate with each other there is a chance of temporary self-correcting faults, like unavailability of services, temporary loss of network, or request timeouts because of server busy, in these cases, we can use another implement so that problems can be decreased.

Setup:

To use Spring Retry we need to add the below dependency.

<dependency>
<groupid>org.springframework.retry</groupid>
<artifactid>spring-retry</artifactid>
<version>1.1.2.RELEASE</version>
</dependency>

Spring Retry uses Spring AOP, we need to add Spring AOP dependency to the classpath.

<dependency>
  <groupid>org.springframework</groupid>
  <artifactid>spring-aop</artifactid>
  <version>4.2.5.RELEASE</version>
</dependency>
<dependency>
  <groupId>org.aspectj</groupId>
  <artifactId>aspectjweaver</artifactId>
  <version>1.8.8</version>
</dependency>

If we are utilizing spring boot then we require to use then we can add the spring boot app as a dependency.

<dependency>
  <groupid>org.springframework.boot</groupid>
  <artifactid>spring-boot-starter-aop</artifactid>
</dependency>

Enable Spring retry in spring based applications:

Spring Retry provides @EnableRetry annotation to bootstrap the framework. We need to add this annotation on any one of the @Configuration annotated classes.

This framework was developed using spring AOP proxies. In spring AOP supports two types of proxies, JDK dynamic proxies, and CGLIB proxies.

@EnableRetry provides one attribute proxy target class to specify either to use CGLIB proxy or JDK dynamic proxy.

Adding spring retry annotation to spring classes:

We can add @Retry annotation to any method that we want to repeat the method if any exception occurs during the execution.

We can customize the re-try configuration using annotation attributes.

•    Include: accepts comma-separated exceptions, for which exceptions this method has to invoke.

•    Interceptor: Try again the interceptor bean name to be applied for the retryable method.

•    Value: Exception types that are retryable. Synonym for includes(). Defaults to empty (and if excludes is also empty all exceptions are retried).

•    Exclude: Exception types that are not again triable. Defaults to empty (and if includes is also empty all exceptions are retried).

    Stateful: Flag to represent the retry is stateful: i.e. exceptions are again thrown, but the retry policy is applied with the same policy to the next invitation with the same arguments. If false then retriable exceptions are not again thrown. The default is value.

•    Max attempts: the maximum number of attempts (including the first failure), the default value is 3

•    Backoff: define the backoff properties to try again this operation. The default is no backoff.

BackOff attribute is used to provide inputs to retry operations like specifying delay, max-delay, etc… using @backoff annotation.

Example:

@Retryable(value = {SampleException.class, SimpleException.class}, maxAttempts = 5)
publicvoidretryWithException() {
System.out.println("retryWithException");
thrownewSampleException("exception in retry annotate method");
    }

@Recover: we can annotate any method with this annotation to mark it as a recovery method for retry operations. Recovery handler methods need to have the first argument of type Throwable (or any subtype of Throwable) and the return type of this method must be the same as the return type of @Retryable to the method. The Throwable first argument is optional (but it will be called only if none of the recovery methods matches), and the subsequent arguments are populated from the @Retryable method.

Example:

@Recover
publicvoid recover(SampleExceptionexception) {
System.out.println("recovering from SampleException ->" + exception.getMessage());
    }

Some of the most useful Classes in the spring retry framework:

RetryTemplate: To make it robust and less error-prone to failure sometimes we need to retry failed operations on a subsequent attempt. For example, a remote call to web service that fails on network failures or deadlock situation which may be resolved after a short wait, to automate the retry of such operations springRetry has a strategy RetryOperations strategy.

The RetryOperation will look like this:

public interface RetryOperations {
    <T, E extends Throwable> T execute(RetryCallback<T, E>retryCallback) throws E;
    <T, E extends Throwable> T execute(RetryCallback<T, E>retryCallback, RecoveryCallback<T>recoveryCallback) throws E;
    <T, E extends Throwable> T execute(RetryCallback<T, E>retryCallback, RetryStateretryState) throws E, ExhaustedRetryException;
    <T, E extends Throwable> T execute(RetryCallback<T, E>retryCallback, RecoveryCallback<T>recoveryCallback, RetryStateretryState) throws E;
}

And the retrycallback will look like this:

public interface RetryCallback<T, E extends Throwable> {
    T doWithRetry(RetryContext context) throws E;
}

This is a basic callback to insert some business logic to retry the operation.

The callback is performed and if it fails (by throwing an Exception), it will be tried again until either it is successful, or the execution decides to abort. There are a number of overloaded performance methods in the RetryOperations interface dealing with several use cases for recovery when all try again attempts are exhausted, and also with try again state, which permits customers and implementations to store information between calls.

For example, for timeout retry operations spring retry framework has a TimeoutRetryPolicy policy.

We can add this retry policy in the retry template so that it will be retried until timeout for a successful response.

RetryTemplateretryTemplate = new RetryTemplate();
TimeoutRetryPolicyretryPolicy = new TimeoutRetryPolicy();
retryPolicy.setTimeout(1000L);
retryTemplate.setRetryPolicy(retryPolicy);
retryTemplate.execute(new RetryCallback<HelloWorld, Exception>() {
    @Override
    public HelloWorld doWithRetry(RetryContext context) throws Exception {
        return result;
    }
});

The above example executes a web service call and returns the result to the user, if that fails then it is retried until the timeout is reached.

RetryContext: The method argument for the RetryCallback is a RetryContext.It is used as an attribute bag to store data for the duration of the iteration.ARetryContext will have a parent context if there is a fixed retry in progress in the same thread. The parent context is sometimes useful for holding data that need to be shared between calls to execute.

RecoveryCallback: It is the callback interface if all configured retry policies are executed but don`t receive a successful response.

Listeners: Spring retry provides a RetryListener interface for cross-cutting features in retry operations; RetryTemplate provides a way to attach a listener to it so that it will be called in respected operations.

The RetryListener interface will look like this:

public interface RetryListener {
    <T, E extends Throwable>booleanopen(RetryContext context, RetryCallback<T, E> callback);
    <T, E extends Throwable> void close(RetryContext context, RetryCallback<T, E> callback, Throwablethrowable);
    <T, E extends Throwable> void onError(RetryContext context, RetryCallback<T, E> callback, Throwablethrowable);
}

Open and close methods will be performed before and after the whole retry operation, and the onError method is performed on all individual callback, the close method might also receive a Throwable, if there is an error it is the last one thrown by the RetryCallback.

If more than one listener is configured, there must be some order of execution of listener, open method is executed in the same order as configured, and onErrror and close method will be called in reverse order.

The sample RetryTemplate will be:

publicRetryTemplateretryTemplate() {
SimpleRetryPolicyretryPolicy = newSimpleRetryPolicy();
retryPolicy.setMaxAttempts(5);
 
FixedBackOffPolicybackOffPolicy = newFixedBackOffPolicy();
backOffPolicy.setBackOffPeriod(1500); // 1.5 seconds
 
RetryTemplatetemplate = newRetryTemplate();
template.setRetryPolicy(retryPolicy);
template.setBackOffPolicy(backOffPolicy);
 
RetryListener[] listeners = newRetryListener[2];
listeners[0] = newSampleRetryListener();
listeners[1] = newSimpleRetryListener();
        template.setListeners(listeners);
        
returntemplate;
    }

Conclusion:

Spring Retry is the framework for declarative using @Retryable and @Recover, and programmatic way using RetryCallback and RecoveryCallBack to support retry operations in spring-based applications, this framework also supports cross-cutting using retry listeners.

Source code can be downloaded at: https://github.com/sravan4rmhyd/SpringRetryDemo.git

So, you now know the Spring Retry technology. If you have any questions, ask experts of Java development company straightforward in the comments. Do share your feedback for this post and tell other readers what your experience with this framework was.

Related Article:

Java Developers Sharing Node.Js Performance Tips For Adoption

Exploring The Java Platform Through Best Java Jobs

How to Wrap Text inside the Column in SWT Java-Based Framework?

In this article post, java development company experts will explain the SWT framework. They will guide you on how to wrap text inside the column in SWT. For in-depth information, please read the article.       

Introduction

SWT is for Software Widget Toolkit, its Java-based open-source framework at first developed by IBM now carry on by the Eclipse community.

The eclipse itself is developed on the SWT framework. This framework is used to develop desktop applications. It resembles Java Swings, SWT.

The key topics in this framework are Shell, Display, Perspective, Plug-in, Composite, Group, etc…

You may find many tutorials on the internet

@http://www.vogella.com/tutorials/SWT/article.html

@http://www.java2s.com/Tutorial/Java/0280__SWT/Catalog0280__SWT.htm

@https://www.eclipse.org/swt/examples.php

Problem:-Expressive SWT desktop application will be in the form of tree structure or table: There is the performance that the text inside the cell should be covered if you resize the cell: SWT framework does not provide this functionality directly so that we can implement it on the fly. So we have to make our own execution on top of the SWT framework.

In general, if the values inside the column are larger than the column sizes then SWT displays it as dots appending at the last positions of the column. If we need to look at the whole text then we have to drag the header and look at it.
  • If we want to see the whole text then without dragging the column header then we have to implement our tailored label supplier because SWT does not hold up this feature directly.

Solution: We have solved this matter by applying our own label supplier. We will convince in the sample code, that how we solved this problem. One should have good information about the SWT framework then only he may recognize this solution.  The below code sample will provide the solution for this problem. One requires having SWT, SWTX jar files to run this sample. 

First, make a table using SWT set the label supplier and an implement paint listener so that the column size will be bigger.

Code snippet to create table:

Paint Listener:

privatefinal Listener paintListener = new Listener() {

intheightValue = 69;

intimgX = 40;

privateintimgY = 5;;

privateinttxtX = 4;

privateinttxtY = 5;

@Override

publicvoidhandleEvent(Event event) {

finalTableItemitem = (TableItem) event.item;

switch (event.type) {

caseSWT.MeasureItem: {

String itemText = item.getText(event.index);

Point size = event.gc.textExtent(itemText);

event.width = size.x;

event.height = heightValue;

break;

}

caseSWT.PaintItem: {

final String itemText = item.getText(event.index);

final Image img = item.getImage(event.index);

finalintoffset2 = 0;

intoffsetx = 0;

if (img != null) {

event.gc.drawImage(img, event.x + imgX, event.y + imgY + offset2);

offsetx = 19;

}

if (itemText != null) {

event.gc.drawText(itemText, event.x + txtX + offsetx, event.y + txtY + offset2, true);

}

break;

}

caseSWT.EraseItem: {

event.detail&= ~SWT.FOREGROUND;

break;

}

default:

break;

}

}

<strong>Table Creation:</strong>

tableViewer = newTableViewer(container, SWT.BORDER | SWT.FULL_SELECTION | SWT.MULTI);

tableViewer.setContentProvider(newContentProvider());

ColumnViewerToolTipSupport.enableFor(tableViewer, ToolTip.RECREATE);

table = tableViewer.getTable();

finalFormDatafdFroTable = newFormData();

fdFroTable.top = newFormAttachment(0, 5);

fdFroTable.left = newFormAttachment(0, 4);

fdFroTable.right = newFormAttachment(100, -15);

fdFroTable.bottom = newFormAttachment(100, -35);

table.setLayoutData(fdFroTable);

table.setLinesVisible(true);

table.setHeaderVisible(true);

shell.setSize(400, 400);

shell.open();

finalTableViewerColumntableViewerColumn = newTableViewerColumn(tableViewer, SWT.NONE);

finalTableColumntableColumn = tableViewerColumn.getColumn();

tableColumn.setWidth(100);

ValueLabelProviderlabelProvider1 = newValueLabelProvider(0);

tableViewerColumn.setLabelProvider(labelProvider1);

tableColumn.setText(“Column1”);

tableViewerColumn.setLabelProvider(newTextWrapperLabelProvider(tableViewer, 0, labelProvider1));

tableViewerColumn.getColumn().addControlListener(newControlAdapter() {

@Override

publicvoidcontrolResized(ControlEvente) {

tableViewer.refresh(true);

}

});

addColResizeListener(tableColumn);

Collection<ValuObject>valuObjects = newArrayList<>();

for (inti = 0; i< 3; i++) {

ValuObjectvaluObject = newValuObject();

valuObject.setValue1(” Hi this is test program for text wrapper example” + i);

valuObjects.add(valuObject);

}

table.addListener(SWT.MeasureItem, paintListener);

table.addListener(SWT.PaintItem, paintListener);

table.addListener(SWT.EraseItem, paintListener);

tableViewer.setInput(valuObjects);

Set the label to supply for each column otherwise, it will throw an exception and use this label provider to get its corresponding values while wrapping

Set text wrapper label supplier, so that text will be wrapped for all changes in the header of the column. Don’t forget to add Resize listener, otherwise, the label supplier will not be called for each change.

finalstaticclassValueLabelProviderextendsColumnLabelProvider {

privatefinalintcolumnIndex;

protectedValueLabelProvider(intcolumn) {

super();

this.columnIndex = column;

}

/**

* {@inheritDoc}

*/

@Override

public String getText(Object element) {

String text = null;

finalValuObjectvaluObject = (ValuObject) element;

switch (columnIndex) {

case 0:

text = valuObject.getValue1();

break;

default:

text = null;

}

returntext;

}

}

<strong>Content Provider:</strong>

/**

* The Class ContentProvider.

*/

publicclassContentProviderimplementsIStructuredContentProvider {   

@Override

publicvoid dispose() {

}

@Override

@SuppressWarnings(“rawtypes”)

public Object[] getElements(Object inputElement) {

if (inputElementinstanceof Collection) {

return ((Collection) inputElement).toArray();

} else {

returnnull;

}

}  

@Override

publicvoidinputChanged(Viewer viewer, Object oldInput, Object newInput) {

}

}

publicclassTextWrapperLabelProviderextendsColumnLabelProvider {

privatefinalintcolumnIndex;

privatefinalColumnViewerviewer;

privateColumnLabelProviderlabelProvider;   

publicTextWrapperLabelProvider(ColumnViewerviewer, intindex, ColumnLabelProviderlp) {

this.labelProvider = lp;

this.viewer = viewer;

this.columnIndex = index;

}

/**

* {@inheritDoc}

*/

@Override

public String getText(Object element) {

GC gc = null;

try {

gc = new GC(viewer.getControl());

intcolumnWidth = getColumnWidth();

intcolumnHeight = findHeight();

String columnText = “”;

Font columnFont = null;

columnText = labelProvider.getText(element);

columnFont = labelProvider.getFont(element);

gc.setFont(columnFont);

final String text = TextWrapperExample.wrapColumnText(gc, columnText, columnWidth, columnHeight);

returntext;

} finally {

if (gc != null) {

gc.dispose();

}

}

}  

privateintfindHeight() {

intitemHeight;

if (viewerinstanceofTableViewer) {

TableViewertableViewer = (TableViewer) viewer;

final Table table = tableViewer.getTable();

itemHeight = table.getItemHeight();

} elseif (viewerinstanceofTreeViewer) {

TreeViewertreeViewer = (TreeViewer) viewer;

final Tree tree = treeViewer.getTree();

itemHeight = tree.getItemHeight();

} else {

itemHeight = 0;

}

returnitemHeight;

}  

privateintgetColumnWidth() {

intwidth;

if (viewerinstanceofTableViewer) {

TableViewertableViewer = (TableViewer) viewer;

final Table table = tableViewer.getTable();

TableColumncolumn = table.getColumn(columnIndex);

width = column.getWidth() – table.getBorderWidth() – table.getBorderWidth();

} elseif (viewerinstanceofTreeViewer) {

TreeViewertreeViewer = (TreeViewer) viewer;

final Tree tree = treeViewer.getTree();

TreeColumncolumn = tree.getColumn(columnIndex);

width = column.getWidth() – tree.getBorderWidth() – tree.getBorderWidth();

} else {

width = 0;

}

returnwidth;

}

}

VERY important

The table viewer should be regenerated for all header changes. So, that’s why control listener for table viewer column.

Build data for the table column, in this case, there is only one column, so I am setting only one column value. If you have various columns then want to set many values to a value object

After table design without wrapper if you start the program the output will be like the below:

If you notice in the above screenshot the text inside column1 is not wrapped in the text is superior to the length of the column.

If you put the text wrapper label supplier then the text in the table cell will be wrapped as per the column header exchange. The screenshot will see below.

  • First, look over the number of possible lines for the changed header size. If the number of possible lines is greater than 1 then only wrap the text.
  • To wrap text first the string inside the cell is spitted by delimiter either empty space or tab space, they will be stored inside a collection. So that they will be used at the time of wrapping based on header size.
  • Upon the new column, header size gets the text wrapper to be wrapped add that to the last of the string by adjoining \n that is a new line so that the wrapped text segment will be presented in a new.
  • It’s very essential to add a new line, then only it will present as a new line that is as a wrapped line. SWT can handle this case.

protectedstatic String wrapColumnText(GC gc, final String inputString, intlineWidth, intitemHeight) {

intfontHeight = gc.getFontMetrics().getHeight();

intleadingAreaLenght = gc.getFontMetrics().getLeading();

intlineHeight = fontHeight – leadingAreaLenght + 4;

intnoOfLinesPossible = itemHeight / lineHeight;

if (noOfLinesPossible == 1) {

returninputString;

}

Point resizePoint = getResizedPoint(gc, inputString);

if (resizePoint.x<= lineWidth&& (itemHeight == 0 || resizePoint.y<= itemHeight)) {

returninputString;

}

intlines = 1;

Pattern p = END_LINE;

String input = p.matcher(inputString).replaceAll(“\n”);

List<WrappedText>wrappedTextCol = getWrappedTextCol(input);

StringBufferbuffer = newStringBuffer();

intstart = 0;

intwrappedTextIndex = -1;

while (true) {

intwrappingIndex = findWrappingTextIndex(gc, lineWidth, lineHeight, input, wrappedTextCol,

start, wrappedTextIndex);

if (wrappingIndex<= wrappedTextIndex) {

wrappingIndex++;

}

booleanisLast = wrappingIndex>= wrappedTextCol.size();

intend;

intnextStart;

if (isLast) {

end = input.length();

nextStart = end + 1;

} else {

WrappedTextwrappedText = wrappedTextCol.get(wrappingIndex);

end = wrappedText.getStartPos();

nextStart = wrappedText.getEndPos();

}

addText(buffer, input, start, end);

lines++;

if (isLast) {

break;

} else {

start = nextStart;

wrappedTextIndex = wrappingIndex;

}

if (noOfLinesPossible> 0 &&lines>= noOfLinesPossible) {

end = input.length();

addText(buffer, input, start, end);

break;

}

}

String string = buffer.toString();

returnstring;

}

Change the input by empty space or minus delimiter and add to the wrapped text collection

privatestatic List<WrappedText>getWrappedTextCol(String input) {

List<WrappedText>wrappedTextCol = newArrayList<WrappedText>();

Pattern p = Pattern.compile(“[ \t]+|[^ \t\n]-|[\n]|[,]”);

Matcher matcher = p.matcher(input);

WrappedTextwrappedText;

while (matcher.find()) {

booleanminus = ‘-‘ == input.charAt(matcher.end() – 1);

if (minus) {

wrappedText = newWrappedText(matcher.end(), matcher.end());

} else {

wrappedText = newWrappedText(matcher.start(), matcher.end());

}

wrappedTextCol.add(wrappedText);

}

returnwrappedTextCol;

}

Then, getting the wrapping segments to check whether the changed header length is greater than the text inside the cell, then we want to wrap the text by calculating which wrapped text of the group should be wrapped.

To evaluate which wrap text logic is as below:

privatestaticintfindWrappingTextIndexRec(GC gc, intlineWidth, intlineHeight, String input,

List<WrappedText>wrappingCol, inttextStartPos, intstartIndex, intendIndex) {

inttestIndex = (startIndex + endIndex) / 2;

inttextEndPos = testIndex< 0 ? textStartPos

: testIndex>= wrappingCol.size() ? input.length()

: wrappingCol.get(testIndex).getStartPos();

String text = input.substring(textStartPos, textEndPos);

intnextStart = startIndex;

intnextEnd = endIndex;

booleantooBig = checkIfStringLongerThanResize(gc, lineWidth, lineHeight, text);

if (tooBig) {

nextEnd = testIndex;

} else {

nextStart = testIndex;

}

if (nextEnd – nextStart<= 1) {

returnnextStart;

} else {

intindex = findWrappingTextIndexRec(gc, lineWidth, lineHeight, input, wrappingCol, textStartPos,

nextStart, nextEnd);

returnindex;

}

}

Helper methods:

privatestaticbooleancheckIfStringLongerThanResize(GC gc, intlineWidth, intlineHeight, String text) {

Point textSize = getResizedPoint(gc, text);

booleanwidth = textSize.x>= lineWidth;

booleanheight = textSize.y>lineHeight;

returnwidth || height;

}

privatestatic Point getResizedPoint(GC gc, String string) {

Point extend = SWTX.getCachedStringExtent(gc, string);

returnextend;

}

After setting the text wrapping label supplier if you run the program output will be like this:

After wrapping the screenshot will see it like this. If you notice the text inside the cell is wrapped according to the column header size.

Java development company specialists just shared the guide to wrapping text into the column in the SWT java based framework. You can try and observe your own and share the results with our readers by commenting below.

Related Articles:

Social Networks And B2b: Do Not Miss The Boat Trends

ARM 64-bit quad-core 1.8 GHz for the new 96Board

How to use DynamoDB and cloud in Java web development

How to use DynamoDB and cloud in Java web development

Concept of NoSQL, AWS, and DynamoDB by Aegis Softtech

In this post, the Aegis java development team will discuss the concept of NoSQL, AWS, and DynamoDB and how to use them in java web development projects. The viewer will also want to know about Amazon DynamoDB architecture and its data model idea.

What is NoSQL?

NoSQL – often referred to as Not a SQL – is a database that offers storage and retrieval of data that is stored in a way other than the normal RDBMS. Relational databases were never meant to handle the scale and cleverness challenges that face current applications, nor were they designed to handle the huge amounts of data to bring out ‘information’ it. NoSQL comprised of a variety of database technologies was developed in response to a rise in the volume of data stored about users, their data patterns, the frequency and way in which this data is accessed, and performance and processing needs. Java has primarily been the language since the early days to connect and play with NoSQL databases. Being the strong part, we are going to delve in-depth into how Java development connects with NoSQL DB.

With the advent of the Internet age, the rise of social media, social applications, e-commerce, etc., there has been a burst of data production containing useful information. The current RDBMS techniques though can be handled somehow to store the large amounts of volume but then it becomes increasingly difficult to process those data in order to fetch ‘useful information. A NoSQL technique answers the questions by storing the data in key-value, graphs, documents, etc., which is different from relational databases, making some operations faster in NoSQL and others faster in relational databases. The choice of what technology to use depends on the problem at hand to be solved.

There are many different NoSQL databases in the market. Some of the examples include Cassandra, MongoDB, DynamoDB, Hbase, MemcacheDB, etc.

AWS(Amazon Web Services) and DynamoDB?

Amazon Web Services is a Cloud Service and it is one of the huge Cloud suppliers amongst all those who are supplied. AWS comes with a group of services, all of them serving the cloud model, that permits any application to use the powerful benefits that the Cloud model advises. Begining from sharing of the processing power to the database to the security system to the sharing of computer hardware, it is the one-stop store for any cloud necessity application. One of the most famous and widely used services is DynamoDB: A NoSQL approach to storing data. DynamoDBis a very flexible service that provides a seamless interface for creating, storing, and retrieval of data.

The operations on DynamoDB can either be performed using the AWS UI, AWS CLI (Command Line Interface), or the AWS SDK. The SDK comes in a variety of languages enabling a wide variety of developers to code the applications performing operations on the service. We shall be discussing the Java approach to the system because the Java team in the company has had a long experience developing the applications that have DynamoDB as the back-end database. The pre-requisites for operating in Java would be a JAVA SDK and Maven installed on the machine.

Some Of The Advantages Of Using Dynamodb Are As Follows:

  • Scalable – DynamoDB is created for perfect throughput and storage scaling.
  • It is fast and has a predictable performance
  • Easy Administration – The service is a fully managed one. One creates the DB and the service handles the rest without worrying about the hardware and software provisioning.
  • Built-in Fault Tolerance – The built-in fault tolerance feature of DynamoDB is a rather powerful one. It automatically and synchronously replicas your data across multiple Availability Zones
  • Secure – The service uses proven cryptographic methods to authenticate users and prevent unauthorized data access
  • Integrated Performance – DynamoDB displays a variety of operational metrics for each table in the console. It can also be integrated with another AWS Service called CloudWatch for enhancing metrics.

How to use Amazon DynamoDB?

To use AWS DynamoDB, or as a matter of fact, any of AWS Services, one must download the AWS SDK to use its features. In the case of expert utilization, the following extracts of code are used to download the SDK. If the expert is not present, one can manually download the AWS-java-SDK from the web.

The category can be changed to suit the necessity.

Amazon DynamoDB Architecture

Before proceeding further it would be nice to understand some technical jargon associated with DynamoDB. The DynamoDB data model idea includes tables, products, and attributes.

  1. Table – A database is a collection of tables. A table is an entity that stores the data. A table is a group of products and each product is a group of attributes. In difference to relational databases, DynamoDB needs that the table has the main key, and it does not necessary to mark all of the attribute names and data types further. All products can have any number of attributes.
  • Item – Each item in a DynamoDB table corresponds to a row in a relational database.
  • Attribute – Each attribute in an item is a name-value pair. An attribute could be a single or multi-valued set.

DynamoDB API:

Following are the most important DynamoDB API calls that are used very frequently and are the ones that we have been using in our projects.

  1. CreateTable: This is the API call that is used to create a table in an AWS account in a particular region.

When you create or update a table, you define how much equipped throughput volume you need to save for reads and writing. DynamoDB will save the required machine resources to meet your throughput needs while securing compatible low-latency execution.

Related Articles:

Java Development Company Taking You on Java SE 8 Latest Features Tour

Java Major Milestones And Disappointments – Get To Know Now!

Setting Up For Managing Production and Development Environment In ASP.NET Core

In today’s world of advanced technologies, building web applications has become important for organizations. There are many languages that the developers use to develop such web applications and ASP .NET by Microsoft is one of those. It has been very popular among the developer fraternity for many years.

While making a web application, one needs to focus on the three environments through which an application goes. These are development, staging, and production. Each environment needs to be configured the application separately. To manage this, ASP .NET provides the user with three tools; each for one stage. One tool is used to manage profiles, another tool is used at the coarse-grained level while the last tool is used at the fine-grained level.

Managing profile

This process is fundamentally driven by value in the ASP.NETCORE_ENVIRONMENT environment variable. This value cannot be set by the user in the application code and the only way to set the value is through control panel->System->advanced system settings->environment variable from PowerShell or by command prompt. The only way to set this on any software, which is being used for .net coding, is through the launchsettings.json file. This file organizes settings into profiles with each profile triggered with the way application is started.

One can find this file nested under the properties node in the solution explorer. The easiest way to manage this file is through the properties dialogue of the project. The debug tab can be used to see all the profiles in the launch settings through a UI offered by it. Here the UI allows the user to update as well as create profiles.

In Visual Studio 2019, the user has been provided with 4 default profiles that are set up with ASP .NET core projects. Out of these profiles, only two profiles are needed by the user to manage the environment variable. These profiles are “IIS Express” and the other is named after the project name. Both of the profiles set the variable to “development” while the default setting of the environment variable is production.

Coarse-Grained Configuration

.NET core uses the environment variable to determine which appsettings.json file and the Startups.cs files are going to be used. For instance, if the environment variable is set to development, then the core uses the file appsettings.development.json file initially and then uses the value of the appsettings.json file. This is only used when the first file is not found. It also looks for a class called Startup Development to configure the project when the environment variable is set to develop.

The only problem a user might face with this feature is that it isn’t turned on by default and he/she needs to turn it on before using This Feature of .NET. To do this, one needs to modify the program.cs file, where one needs to modify the way the Create WebHostBuilder method calls the UseStartup method. One needs to change the general version of the use startup method to the one which accepts the name of the project.

Fine-Grained File

On the project, if one wants to perform more fine-grained checking, then the user needs to call the method on the IHostingEnviornment object. He can request the object in any method called by ASP .NET core. A specific code is placed in the env property of the program where the object is required, so that in the future when an action method requires it, then it can retrieve it from the program’s env property.

The object supports two methods, which return true or false values based on the environment variable. These methods are is Production, staging methods. These methods are generally used by action methods to either login or log off. These methods are driven by environment variables being set to either of the two states. The method for the state is going to return true if the environment variable is set to that value. Otherwise, for other sets of variables, it is going to return false.

If the user wants to use another value in the environment, then he/she set the value of the environment variable, the one that he/she is willing to use in the app settings files and startup classes. The .NET core will use that value. With the IHostingEnvironment object, one needs to use its environment method and pass the value he/she set the environment variable in his/her profile. Asp.Net developers provide the necessary tools to automate these changes but these changes are needed to be done by the user manually. It will take some processing time to reflect these changes.

Building a normal web application with .net is an easy task but as we add more things to the website, which make it more complex, then it is necessary that one knows that he/she knows how to manage production and development settings in ASP .NET core.

Related Post:

How to Outline and Build Cross Platform App using ASP.NET Core?